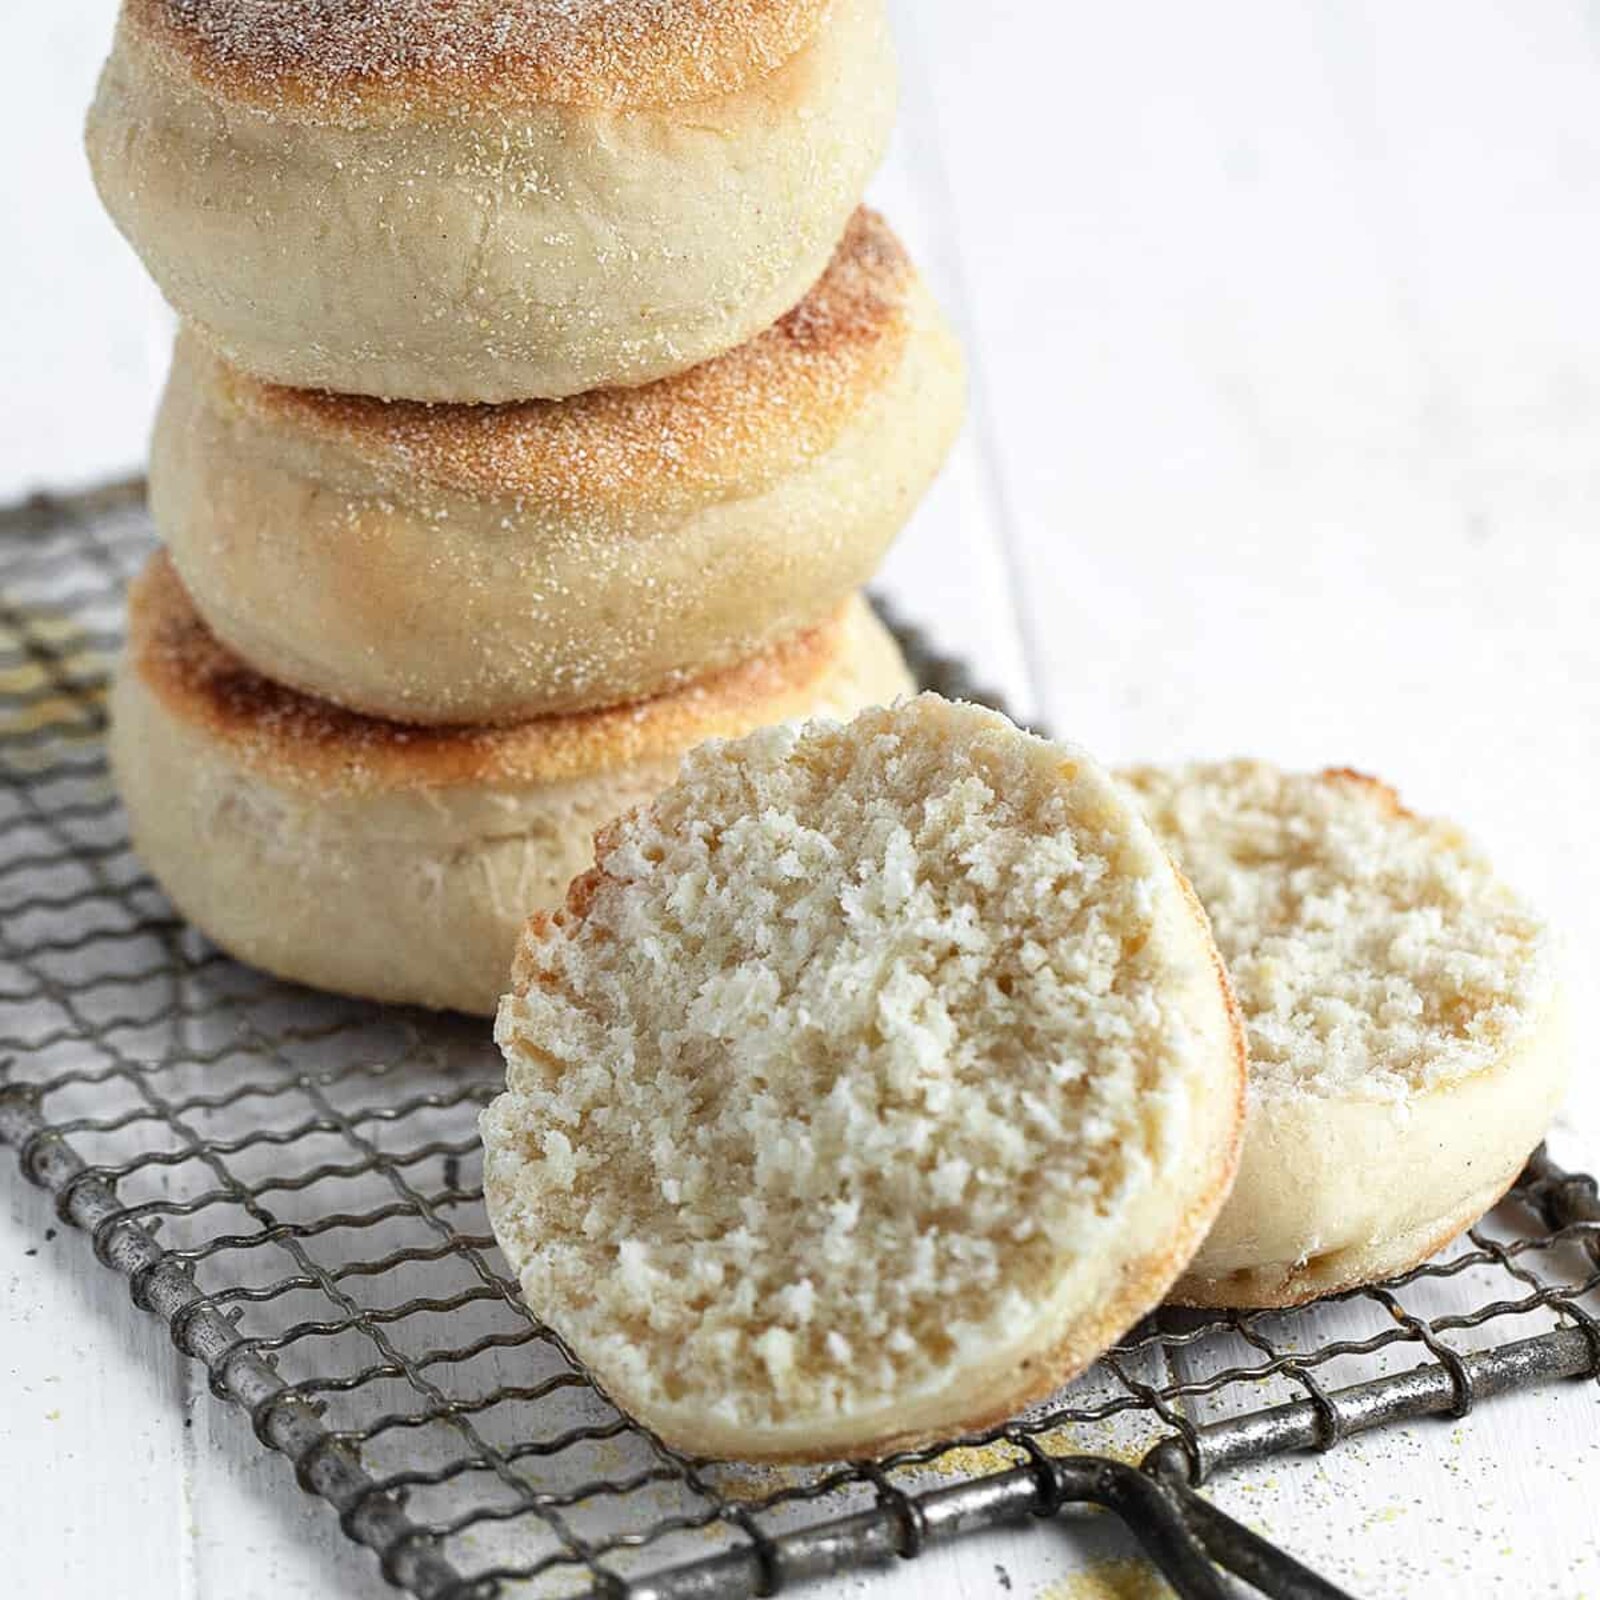
Nooks, Crannies, and Zero Gatekeeping
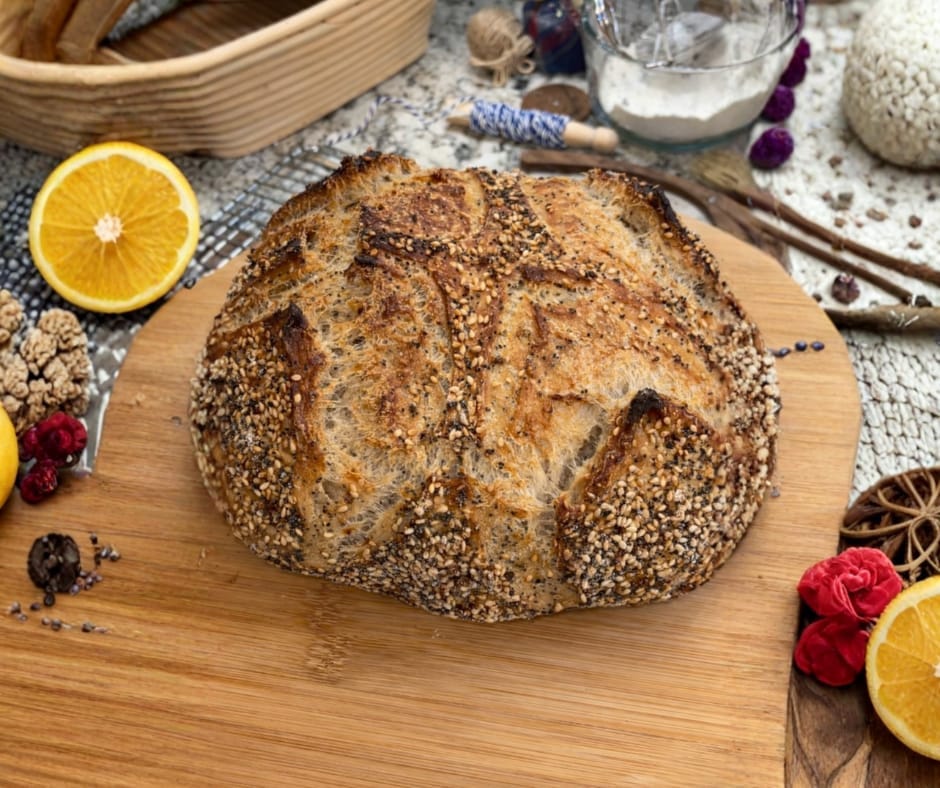
IntermediateHenry's Overnight Sourdough EnglishMuffins
by Henry Hunter Jr.
Better than Thomas' with ingredients you can actually pronounce.
Fermentation
8-10 hours
Bake Time
Varies
Yield
10 to 12 English muffins, about 80g each

Perfection is not required
"Perfection is not required. Your first batch might be a little wonky. That's okay. They'll still taste better than anything from a package."— Henry Hunter Jr.
By Henry Hunter Jr., founder of Crust & Crumb Academy and Baking Great Bread at Home.
Authentic Flavor
Temperature is everything. A cold kitchen means longer fermentation, a warm kitchen means faster. Semolina dusting matters — it prevents sticking and adds that satisfying crunch. Low and slow on the griddle. The #1 mistake is heat that's too high.
Equipment Needed
Ingredients
Main Dough
All wet plus all dry. Mix, fold, then long counter bulk.
12-13% protein for the chew.
Lukewarm, about 85°F / 29°C.
100% hydration, peaked and bubbly. Float test optional.
Warm to about 90°F / 32°C.
Optional. Adds tenderness without changing hydration.
Feeds the starter and helps griddle browning.
For Dusting & Cooking
Semolina is the right call — it browns instead of scorching.
Cornmeal works as a substitute but burns more easily.
Pro Tip
100g of active 100%-hydration starter contributes 50g flour and 50g water. The card reads 78%, but effective hydration lands at about 80% once you count the starter. That's the sweet spot for real nooks and crannies.
Day 1
Feed Your Starter
4-8 hours before mixing
Your needs to be active, peaked, and bubbly. If you're using a refrigerated starter, feed it and let it come to room temperature before starting. You want it at peak activity, not sluggish or recently fed.
Click each step to mark complete
Feed your starter
If refrigerated, discard all but 30g and feed with 60g flour + 60g water. Let it sit at room temperature until doubled and bubbly, usually 4-8 hours depending on your kitchen temp.
The
Drop a small spoonful of starter into a glass of water. If it floats, you're ready to go. If it sinks, give it more time. Float test isn't perfect, but float plus visible domed bubbles means ready.
Pro Tip
No starter? Use the yeasted version. Same overnight method, no starter required.
Day 1 (Evening)
Mix the Dough — Fermentolyse
15 minutes active
We're doing a — all the wet plus all the dry together, including the active starter. The 30-minute rest lets the flour hydrate and the gluten start to organize on its own before we pinch in the salt.
Click each step to mark complete
Combine everything except salt
In a large bowl, combine the bread flour, dry milk powder, active starter, warm milk, lukewarm water, honey, and melted butter. Mix with a dough whisk or wooden spoon until no dry flour remains. The dough will be sticky and shaggy. That's correct.
Rest ()
Cover the bowl and let it sit for 30 minutes. This rest lets the flour fully hydrate and the start to organize.
Pinch in the salt
Sprinkle the salt over the top of the dough. With wet fingers, pinch and squeeze the salt through the dough for 2-3 minutes until fully incorporated and the dough feels more cohesive.
⏱ Wait Time
Fermentolyse rest before adding salt
Pro Tip
Don't add flour to make it less sticky. Wet hands beat dry flour every time on this dough.
Precise Timers
Use these interactive timers to track your stages.
Fermentolyse Rest
Day 1 (Evening)
Coil Folds
2 hours, mostly hands-off
Three s, 30 minutes apart, build strength without degassing. The dough should feel noticeably more cohesive after the third fold.
Click each step to mark complete
First coil fold
Wet your hands. Lift the dough from the middle, let the bottom unfurl, and tuck it under. Rotate the bowl 90° and repeat. Four lifts total. Cover.
Second coil fold
After 30 minutes, repeat the same four lifts. The dough will feel stronger and hold its shape better.
Third coil fold
After another 30 minutes, repeat one more time. The surface should be smooth and the dough should hold a rough dome shape when left to rest.
Rest 30 minutes
Let the dough relax for 30 minutes after the last fold before starting the overnight bulk.
⏱ Wait Time
Three coil folds, 30 minutes apart, plus a final 30-minute rest
Pro Tip
Coil folds preserve air better than stretch-and-folds for a wet dough like this. Lift, let it unfurl, tuck under.
Precise Timers
Use these interactive timers to track your stages.
Between Folds 1 and 2
Between Folds 2 and 3
Rest After Last Fold
Day 1 (Night)
Overnight Bulk Ferment
8 to 10 hours on the counter
Cover tightly. Leave on the counter at 70-75°F overnight. Wild yeast is slow enough that the counter is the right tool. Target: 50 to 75% rise, domed top, bubbly on top. Cold kitchen? 4 hours on the counter, then overnight in the fridge.
Click each step to mark complete
Cover tightly
Cover the bowl with plastic wrap, a flexible bowl cover, or a damp towel taped down. You don't want a skin to form.
Ferment overnight on the counter
Leave at room temperature (70-75°F) for 8 to 10 hours. In a warm kitchen, lean toward 8 hours. In a cool kitchen, closer to 10.
What to look for
In the morning, the dough should be 50 to 75% larger, domed on top, and bubbly across the surface. Not necessarily doubled.
Cold-kitchen fallback
If your room runs below 68°F, do 4 hours on the counter, then move to the fridge overnight. Pull it out 30 minutes before shaping.
⏱ Wait Time
Overnight on the counter
Pro Tip
The counter brings out more tang. The fridge is a fallback for cold rooms, not the default for this version.
Counter overnight at 70 to 75F
Wild yeast works slow enough that the counter lands this dough in the right window over 8 to 10 hours, and you pick up more tang along the way.
Fridge is the cold-kitchen fallback
If your room runs cold, do 4 hours on the counter, then overnight in the fridge. The yeasted companion uses the fridge differently, and that is on purpose.
The Takeaway
Same overnight, different leavener, different tool.
Day 2 (Morning)
Shape the Muffins
15 minutes
Pat, don't roll. Tuck the edges under to form smooth balls. Rings are optional. Be gentle. You spent all night building air pockets and you want to preserve them for the nooks and crannies.
Click each step to mark complete
Dust two parchment sheets
Generously dust two parchment-lined baking sheets with semolina flour.
Turn out and pat
Gently tip the dough onto a lightly semolina-dusted surface. Pat (don't roll) to about ¾-inch thick. Don't degas.
Divide into 10 to 12 pieces
Use a to divide into 10 to 12 equal pieces, about 80g each. A scale helps.
Tuck into smooth balls
For each piece, tuck the edges under to form a smooth ball. Place seam-side down on the semolina-dusted parchment. If using 3.75-inch English muffin rings, place each ball inside a ring.
Dust the tops
Dust the tops with more semolina, then cover loosely with plastic wrap or another sheet pan.
Pro Tip
Rings keep them tall and round but aren't required. Without rings they'll spread a bit and look more rustic.
Shaping
Shaping Options
Tuck-and-ball is the method we use on the card. The other options are valid alternates.
Tuck-and-Ball (recommended)
Pat, divide, tuck edges under for smooth balls. Rings optional.
RecommendedClick each step to mark complete
Pat to ¾-inch thick
Don't roll. Don't degas.
Divide into 10 to 12 pieces
About 80g each. Use a scale and bench scraper.
Tuck edges under
Form smooth balls, seam-side down on semolina parchment.
Rings optional
3.75-inch English muffin rings keep them tall.
Biscuit Cutter
Cut with a 3-inch round cutter for uniform muffins.
Click each step to mark complete
Pat to ¾-inch thick
Floured hands, no rolling pin.
Cut with 3-inch round cutter
Dip cutter in flour between cuts. Press straight down — don't twist.
Transfer to semolina-dusted sheet
Flip to coat both sides.
Gather scraps gently
Press together without kneading, pat out, cut again.
Square (No Scraps)
Maximizes dough usage with zero waste.
Click each step to mark complete
Pat into a rectangle
About 10x12 inches.
Cut into 12 squares
Use a .
Coat all sides in semolina
For classic texture.
Proof and cook as usual
Square muffins toast beautifully.
Proof Test: Gently press a floured finger into the muffin. The indent should slowly fill back about halfway.
Day 2 (Morning)
Final Proof
1 to 1.5 hours
Room temperature until visibly puffed. Sourdough is slower than yeasted. Give it the time.
Click each step to mark complete
Proof at room temperature
Let the shaped muffins proof at room temperature (about 75°F) for 60 to 90 minutes until visibly puffed and pillowy.
Gently poke a muffin with a floured finger. The indent should fill back slowly, about halfway. If it springs back fast, give it 15 more minutes.
⏱ Wait Time
Final proof until puffed
Pro Tip
Sourdough proofs slower than yeasted. Don't rush it.
Precise Timers
Use these interactive timers to track your stages.
Final Proof
Day 2
Griddle Bake
Cast iron or electric griddle, medium-low (350°F). Low and slow is the rule. You want the inside cooked through without scorching the outside.
Step by Step
Preheat the griddle
Heat a cast iron skillet or griddle over medium-low (about 350°F) for at least 10 minutes for even heat.
Grease lightly
Brush with a thin layer of clarified butter or neutral oil. You need very little.
First side: 6 to 8 minutes
Carefully transfer the muffins to the griddle. Cook for 6 to 8 minutes until the bottom is deep golden brown.
Flip and cook second side
Flip carefully (remove rings if using). Cook another 6 to 8 minutes until the second side is deep golden brown.
Check internal temp
Target internal temperature: 205-210°F. If browned but not at temp, finish 5 to 8 minutes in a 350°F oven.
Preheat Griddle
First Side
Second Side
If they're browning fast but raw inside, your heat is too high. Pull back and finish in a 350°F oven. Every stove is different — the first batch is the calibration batch.
Baking Methods
The classic method. Even heat, deep browning, full control.
Equipment: Cast iron skillet or griddle
Preheat 10 minutes
Medium-low, about 350°F.
Grease lightly
Thin layer of clarified butter or neutral oil.
Cook 6 to 8 minutes per side
Flip once, remove rings if using.
Internal temp 205-210°F
Use an instant-read thermometer.
Day 2
Cool and Fork-Split
45 minutes cool
Cool fully on a rack, then fork-split around the equator. Never knife-cut. A knife crushes the nooks. A fork pries them open.
Click each step to mark complete
Cool 45 minutes on a rack
Transfer to a wire rack and let them cool for at least 45 minutes. Cutting them hot makes them gummy.
Fork-split around the equator
Insert a fork around the equator every quarter inch, working all the way around. Pry the halves apart with the fork or your fingers.
Toast cut-side until golden
Toast the cut surface until deeply golden and crisp.
Load up
Butter, jam, honey, eggs, breakfast sandwiches. This is the whole point.
Pro Tip
These are best eaten the same day but will keep at room temp in a paper bag for 3 to 4 days. For longer storage, freeze (see Storage).
Precise Timers
Use these interactive timers to track your stages.
Cool Before Splitting
Nutrition Facts
Per 1 muffin (about 80g) • 10-12 muffins servings per recipe
* Values are estimates based on standard ingredients
Storage
Room Temperature
3 to 4 days in a paper bag. Sourdough's acidity helps shelf life.
Refrigerated
Not recommended. Refrigeration accelerates staling.
Frozen
Up to 3 months. Fork-split before freezing, wrap individually, then bag. Toast from frozen.
Refresh
Toast slices directly from frozen, or warm a whole loaf at 350°F (175°C) for 10-12 minutes.
💡 Toast from frozen. The toaster is the right tool — don't oven-reheat.
Your Feedback
Rate This Recipe
Loading ratings...
Troubleshooting
Baker's Notes
Common questions and solutions for perfect results

If you're serious about scoring, you need the right blade in your hand. Wire Monkey makes handcrafted bread lames from black walnut — built to last, balanced in the hand, and sharp enough to glide through cold dough cleanly every single time. No dragging, no hesitation marks. Just a clean cut.
Wire Monkey Handcrafted Bread Lames
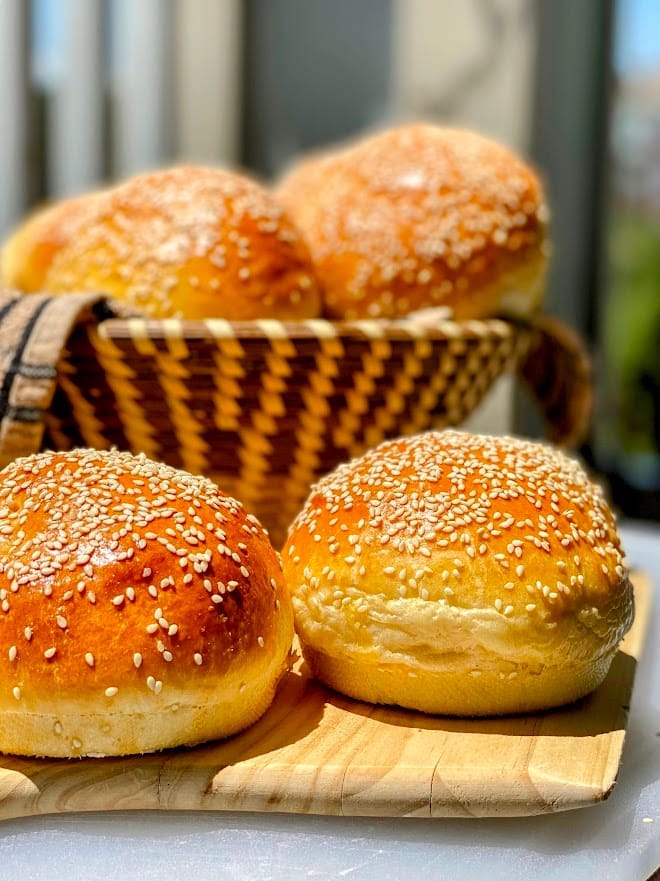
You Might Also Enjoy
More recipes from our pantry that pair well with this bake.

Get More Recipes in Your Inbox
Join thousands of home bakers receiving weekly recipes, tips, and techniques to elevate your bread game.
No spam, ever. Unsubscribe anytime.
More from Baking Great Bread at Home
Tools, resources, and community to help you bake better bread

Crust & Crumb Academy
Go deeper into your craft. FREE courses, challenges, and real feedback. No gatekeeping. Perfection is not required.
Sourdough Starter Companion
Your AI-powered starter assistant. Track feedings, troubleshoot issues, and keep your starter thriving.

Fermentation Compass
Stop guessing when bulk fermentation is finished. Read your dough. Nail your bake.

BakingGreatBread.com
Real bread for the rest of us

Baking Great Bread Blog
Recipes, tips, and stories from the bread journey
Recipe Converter
Convert sourdough recipes to yeast and back again
Crust & Crumb App
Your AI-powered baking assistant

Facebook Community
Join 50,000+ bakers sharing, learning, and supporting each other
Sourdough for the Rest of Us
Free beginner's guide to sourdough