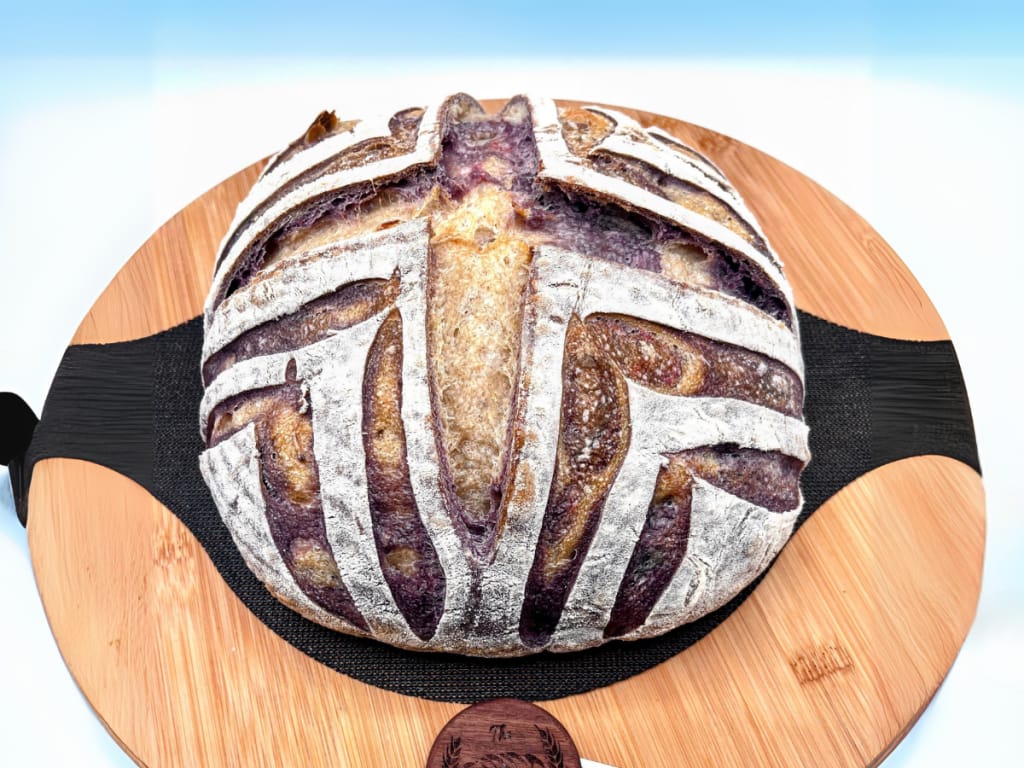
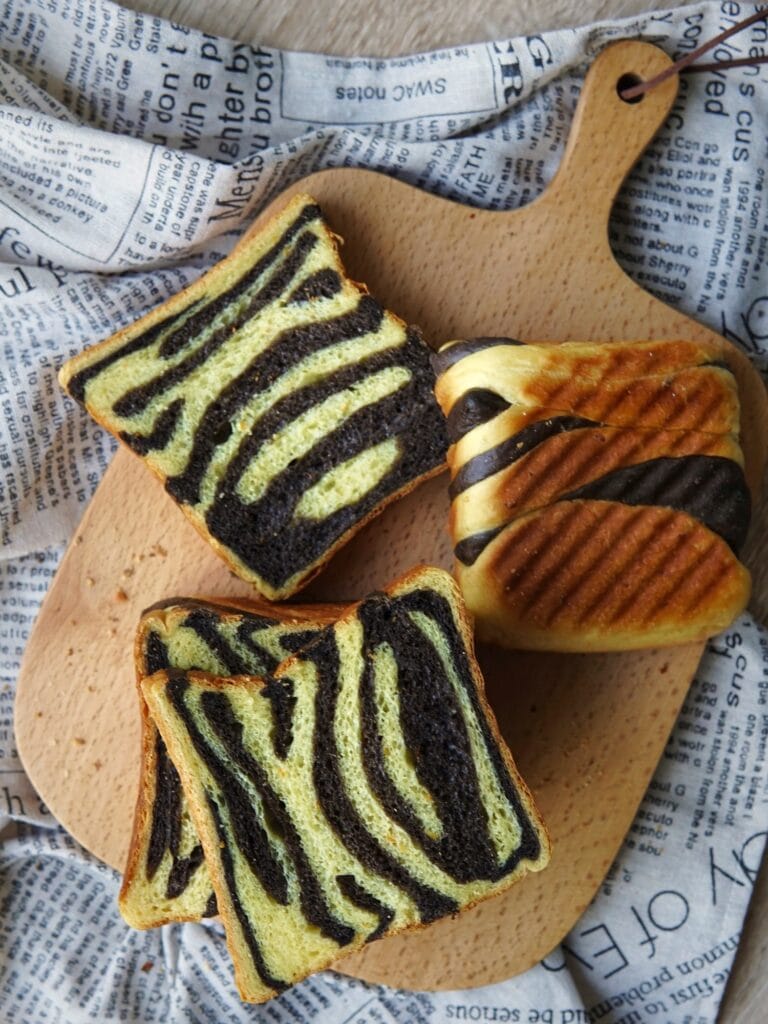
One base dough. Endless color combinations. Stunning every time.
IntermediateMarbled Bread(Yeasted)
by Henry Hunter Jr.
Learn the lamination technique that unlocks any marble pattern
Rise Time
2-3 hours
Bake Time
35-40 minutes
Yield
One 9x5 inch loaf, about 12 slices

Perfection is not required
"Perfection is not required. Progress is."— Henry Hunter Jr.
By Henry Hunter Jr., founder of Crust & Crumb Academy and Baking Great Bread at Home.
Authentic Flavor
Henry taught himself lamination techniques by studying what the marble reveals when you slice it. The swirl is honest. It shows you exactly what you did right and what to adjust next time.
Equipment Needed
Ingredients
Base Dough
This enriched dough is your canvas. It's soft, slightly sweet, and holds color beautifully.
Color Options (choose one or two)
Pick your colors. These are all natural, pantry-friendly options. You only need one colorant per portion of dough.
Egg Wash
Pro Tip
Bread flour gives you more gluten structure, which helps keep the marble layers distinct during baking. All-purpose works but the swirls may blur a bit more.
Day 1
Make the Base Dough
You're building one dough, then dividing it. This is the canvas everything else comes from.
Click each step to mark complete
Combine wet ingredients
In the bowl of your stand mixer (or a large bowl), whisk together the warm water, warm milk, honey, and instant yeast. Let it sit for 5 minutes until you see a little foam.
Add flour and salt
Add the bread flour and salt to the wet mixture. Mix on low speed until a shaggy dough forms, about 2 minutes. Then increase to medium and knead for 6-8 minutes until the dough is smooth and slightly tacky but not sticky.
Add butter
Add the softened butter one tablespoon at a time with the mixer running on medium. Wait until each piece is fully incorporated before adding the next. This takes about 3-4 minutes. The dough will look messy at first. Keep going. It'll come together.
Check the dough
Do the . Take a small piece of dough and gently stretch it between your fingers. If it stretches thin enough to see light through without tearing, you're ready. If it tears, knead another 2-3 minutes.
Pro Tip
If you're mixing by hand, knead for 10-12 minutes on a clean surface. The dough is ready when it's smooth, slightly tacky, and springs back when you poke it.
The role of butter
Butter coats some of the gluten strands, making the dough more extensible and less springy. That extensibility is what allows you to roll the dough thin without it snapping back, which is critical for getting clean, distinct marble layers.
Why flour matters
Bread flour's higher protein content builds more gluten than all-purpose, which gives the structure needed to hold the swirl pattern through the final proof and bake. Lower protein flours work but the layers blur more easily.
The Takeaway
The enrichment makes lamination possible. Lean doughs can marble too, but they're harder to control.
Day 1
Divide and Add Color
This is where you make your creative decision. You can do two colors (most classic), three colors (more dramatic), or keep one portion plain white.
Click each step to mark complete
Divide the dough
Turn the dough out onto a clean surface and weigh it. Divide it into equal portions based on how many colors you want. For two colors: two pieces of about 365g each. For three colors: three pieces of about 245g each.
Work in your colorant
Flatten one portion of dough into a rough rectangle. Sprinkle your chosen colorant evenly across the surface. Fold the dough over it and knead for 2-3 minutes until the color is fully and evenly incorporated. Keep one portion plain if you want a white swirl. Repeat for each color.
Shape into balls and rest
Shape each colored portion into a smooth ball. Place them on a lightly oiled surface, cover with plastic wrap, and let rest for 15 minutes. This rest relaxes the gluten so the dough rolls out easily without springing back.
Cocoa powder
Dutch process cocoa gives the deepest, most reliable color. Natural cocoa works too but the color is a bit more brown than black. Cocoa also adds a very subtle chocolate flavor that pairs well with the milk in this dough.
Matcha
Ceremonial grade matcha gives a more vibrant green. Culinary grade works but the color is duller. Matcha can fade slightly during baking at high heat, so keep your oven temperature in the 350-375F (175-190C) range.
Beet powder
Beet powder gives a beautiful pink-red raw but it fades significantly during baking to a tan-pink. Best used for visual effect before baking or with an overnight cold proof. Still worth it for the crumb reveal.
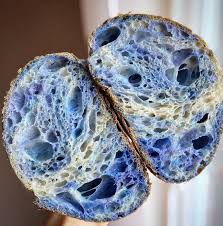
Activated charcoal
Dramatic, true black, and flavor-neutral. A little goes a long way. Start with 5g and add more if you want a deeper black. It stays true through baking unlike beet.
The Takeaway
Cocoa and charcoal give the most reliable baked color. Matcha and beet are more variable but still beautiful.
Day 1
First Rise
Let the dough build structure and flavor before you shape it.
Click each step to mark complete
Bulk fermentation
Place each colored dough ball in a lightly oiled bowl, cover with plastic wrap, and let rise at room temperature (70-75F / 21-24C) until roughly doubled, about 1 to 1.5 hours.
⏱ Wait Time
1-1.5 hours
Pro Tip
All your dough portions need to finish rising at roughly the same time so they're at the same stage when you laminate. Put them in the same spot in your kitchen so they ferment at the same rate.
Precise Timers
Use these interactive timers to track your stages.
First Rise
Day 1
Laminate and Shape
This is the technique that creates the marble. Take your time here. The more deliberate you are, the more defined your swirl will be.
Click each step to mark complete
Roll out each portion
On a lightly floured surface, use a rolling pin to roll each dough portion into a rectangle roughly 10 inches wide and 8 inches tall (25x20cm). Try to get them as close to the same size and shape as possible.
Stack the layers
Lay one rectangle on top of the other, pressing gently so they stick together. If you have three colors, stack all three. Gently press the stack down with your rolling pin to help the layers bond.
Roll into a log
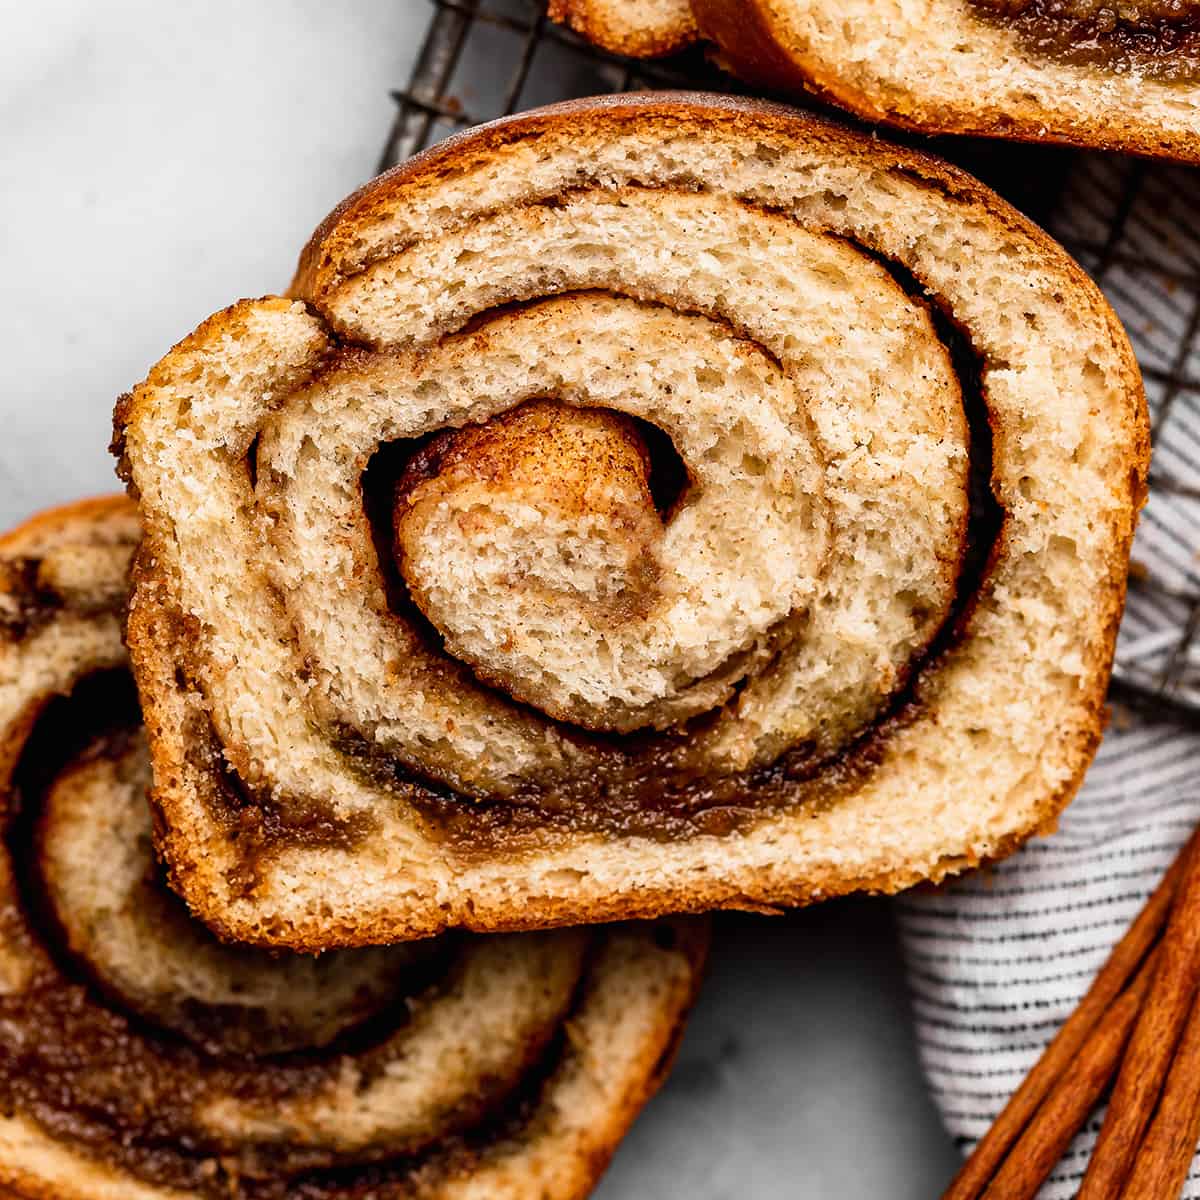
Starting from the short end, roll the stacked dough into a tight log, pressing firmly as you go. The tighter the roll, the more swirl rings you'll see in the final loaf. Pinch the seam closed.
Place in loaf pan
Place the log seam side down into a well-greased 9x5 inch loaf pan. The ends will likely show the swirl pattern already. That's the preview.
Pro Tip
If your dough springs back when you roll it, cover it and let it rest 10 minutes before trying again. The gluten is tight. Give it time.
The lamination principle
When you stack and roll the dough, you're creating concentric rings of alternating colors. The tighter you roll, the more rings per inch. A loose roll gives you a bolder, more graphic swirl. A tight roll gives you finer, more intricate patterning.
Why the layers stay distinct
The key is not over-flouring the surface. Flour between the layers acts as a barrier and prevents them from bonding and baking together. You want the layers pressed firmly against each other so they fuse during baking while still staying visually separate.
The Takeaway
Tight roll equals fine marble. Loose roll equals bold swirl. Neither is wrong. Make what you like.
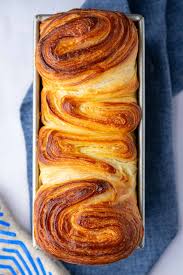
Shaping
The Marble Roll
The shaping is the technique. Stack, roll, seal.
Classic Marble Roll
Stack rolled-out portions and roll into a tight log for even swirl rings throughout the loaf.
RecommendedClick each step to mark complete
Roll flat
Roll each portion to a 10x8 inch rectangle.
Stack
Layer the rectangles directly on top of each other, pressing firmly.
Roll tight
Roll from the short end into a tight log. Pinch the seam.
Pan seam down
Place seam side down in greased loaf pan.
Twisted Marble
For a more dramatic exterior swirl, twist the log before placing it in the pan.
Click each step to mark complete
Roll and stack
Follow classic marble roll steps.
Twist
Hold both ends of the log and twist in opposite directions 3-4 times.
Pan
Tuck the twisted log into the loaf pan. It will look rustic. That's the point.
Day 1
Second Rise
The shaped loaf needs time to proof before it goes into the oven.
Click each step to mark complete
Cover and proof
Cover the loaf pan loosely with plastic wrap and let it rise at room temperature until the dough crowns about 1 inch above the rim of the pan, about 45 minutes to 1 hour. Preheat your oven to 350F (175C) during the last 20 minutes of this rise.
⏱ Wait Time
45-60 minutes
Pro Tip
Don't rush this rise. An under-proofed loaf will have a tight, gummy crumb and the marble won't open up properly when baked.
Precise Timers
Use these interactive timers to track your stages.
Second Rise
Day 1
Bake
Keep the temperature moderate. Higher heat can brown the crust before the interior sets, which can cause the swirl layers to compress.
Step by Step
Egg wash
Whisk together the egg and water. Gently brush the top of the loaf with the egg wash. This gives you a rich, glossy, deeply golden crust.
Bake
Bake at 350F (175C) for 35-40 minutes. The loaf is done when it's deeply golden and the internal temperature reads 190-195F (88-91C).
Cool completely
Remove the loaf from the pan immediately and cool on a wire rack for at least 1 hour before slicing. This is not optional. Cutting too early will compress the crumb and collapse the swirl structure while it's still setting.
Bake
Cool
Baking Methods
The standard method. A loaf pan gives you clean slices that show off the marble pattern.
Equipment: 9x5 inch loaf pan
Preheat
Preheat oven to 350F (175C) for at least 20 minutes.
Egg wash
Brush top of loaf with egg wash.
Bake
Bake 35-40 minutes until internal temp hits 190-195F (88-91C) and crust is deeply golden.
Unmold and cool
Remove from pan immediately. Cool on wire rack at least 1 hour before slicing.
"The lower baking temperature (350F / 175C) is intentional. Higher heat browns the crust before the interior sets and can mute your colors, especially matcha and beet."
Nutrition Facts
Per 1 slice (about 60g) • 12 servings per recipe
* Values are estimates based on standard ingredients
Storage
Room Temperature
3-4 days wrapped in a bread bag or beeswax wrap
Refrigerated
Up to 5 days, tightly wrapped. Bring to room temperature or warm briefly before serving.
Frozen
Up to 3 months. Slice before freezing for easy grab-and-toast.
Refresh
Warm slices at 325F (165C) for 8 minutes or toast directly.
💡 Avoid plastic wrap directly on the crust. It softens it and can cause the surface colors to bleed onto the wrap.
Your Feedback
Rate This Recipe
Loading ratings...
Troubleshooting
Baker's Notes
Common questions and solutions for perfect results

If you're serious about scoring, you need the right blade in your hand. Wire Monkey makes handcrafted bread lames from black walnut — built to last, balanced in the hand, and sharp enough to glide through cold dough cleanly every single time. No dragging, no hesitation marks. Just a clean cut.
Wire Monkey Handcrafted Bread Lames
You Might Also Enjoy
More recipes from our pantry that pair well with this bake.
Get More Recipes in Your Inbox
Join thousands of home bakers receiving weekly recipes, tips, and techniques to elevate your bread game.
No spam, ever. Unsubscribe anytime.
More from Baking Great Bread at Home
Tools, resources, and community to help you bake better bread

Crust & Crumb Academy
Go deeper into your craft. FREE courses, challenges, and real feedback. No gatekeeping. Perfection is not required.
Sourdough Starter Companion
Your AI-powered starter assistant. Track feedings, troubleshoot issues, and keep your starter thriving.

Fermentation Compass
Stop guessing when bulk fermentation is finished. Read your dough. Nail your bake.

BakingGreatBread.com
Real bread for the rest of us
Baking Great Bread Blog
Recipes, tips, and stories from the bread journey
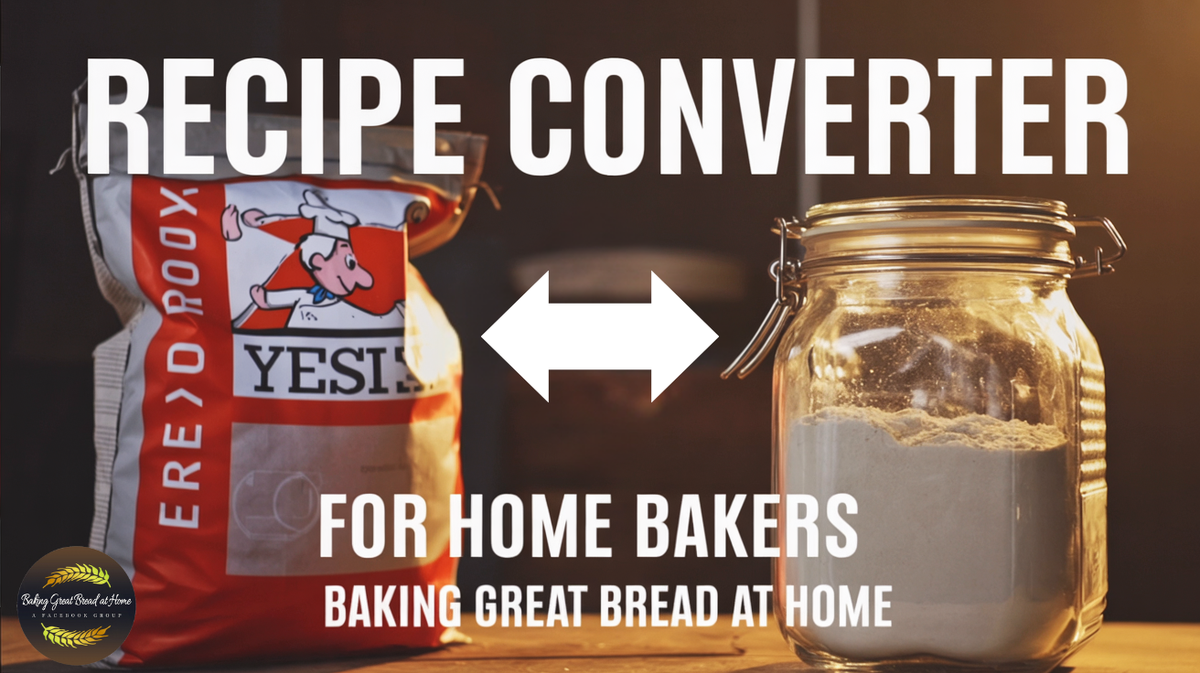
Recipe Converter
Convert sourdough recipes to yeast and back again
Crust & Crumb App
Your AI-powered baking assistant

Facebook Community
Join 50,000+ bakers sharing, learning, and supporting each other
Sourdough for the Rest of Us
Free beginner's guide to sourdough